Upload Image File to Vmware Esxi -iso
If yous already take a running virtual Linux host on a VMware hypervisor, just would like to take reward of the scalable hardware and MaxIOPS storage applied science, information technology is possible to import VMware systems to UpCloud. To get your existing server running in the cloud y'all will demand to upload the server epitome to a new deject host, convert it to the RAW format, re-create the converted epitome to a new storage drive, and reconfigure the host. This migration guide goes through each step in detail to help you transfer pre-existing virtual servers to the cloud.
Delight annotation that only Linux based virtual hosts can be imported. Windows Servers need to be deployed using the templates provided by UpCloud due to licensing reasons.
Exam hosting on UpCloud!
Deploying a new server
To start off, log in to your UpCloud command panel and deploy a new server. You can choose whichever flavour of Linux yous adopt, but for convenience, yous could employ the same distro as the arrangement paradigm yous are migrating.
The new server will be used to download, convert and fix the prototype being imported. Consider the following when making the configurations:
- Selecting the location you lot wish to import the server
- Cull the configuration, the 1CPU and 1GB uncomplicated program works fine
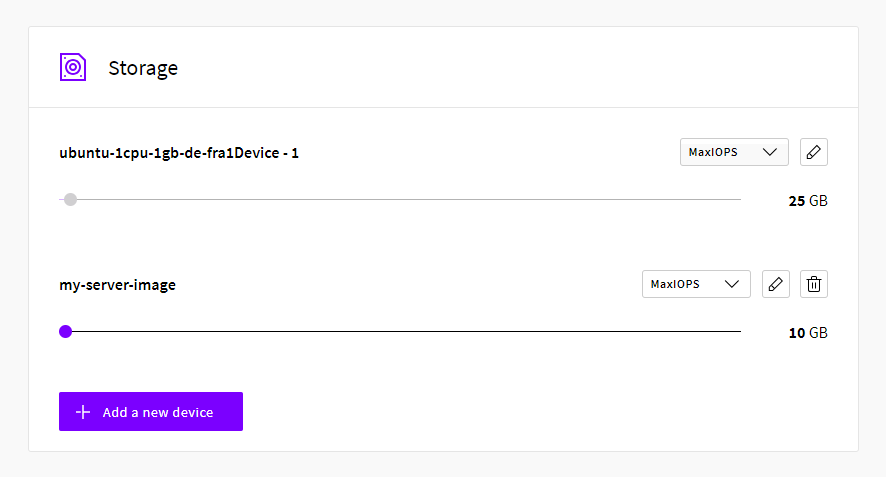
- Add a 2nd storage disk past clicking the Add a new device button and choose the size, information technology tin can exist scaled up later
- Pick the OS you are comfortable with for a one fourth dimension kicking
- Include any SSH keys you wish if available to allow password-free login
- Naming your server and giving it a clarification.
- Ostend your selections and click the Deploy button.
Once the configurations are done, striking the Deploy server button. Look a few seconds for the server to start, then log into the newly deployed host to continue.
Update the system to make sure the software is running the latest versions.
# Debian and Ubuntu sudo apt-get update && sudo apt-become dist-upgrade -y # CentOS sudo yum update -y
With the new server up to appointment, bank check that both of the storage drives are attached and report their size correctly.
lsblk
NAME MAJ:MIN RM SIZE RO Type MOUNTPOINT vda 253:0 0 25G 0 disk └─vda1 253:1 0 25G 0 office / vdb 253:16 0 10G 0 deejay
Here the vda disk with a sectionalisation chosenvda1 is your chief storage and the vdb disk as the secondary device without partitions. If everything seems in order, continue with uploading to import VMware system image to your cloud server.
Importing VMware system image
Depending on your VMware hypervisor configuration the arrangement storage disk might exist stored in one or more files. The VMware virtual disk files are unremarkably named the same every bit your virtual organisation and have a .vmdk file extension. You will need to re-create the .vmdk files to the new cloud host, for case, using Secure Copy, SFTP or rsync.
You lot can find out most some of the different secure file transfer options in the first section Encrypt communications in the article for how to secure your Linux cloud server. Depending on your VMware system and your network connection it may exist useful to compress the disk files for the transfer and then uncompress again on the target host.
Once yous have finished uploading the organisation image files, you will demand to catechumen them from a VMware image to the RAW format. The file format can be converted using the qemu-img utility available through the package managers on well-nigh Linux distributions. With Ubuntu and other Debian based systems, information technology is included in the qemu-utils packet while on CentOS it can exist installed by itself.
# Debian and Ubuntu sudo apt-become install qemu-utils # CentOS sudo yum install qemu-img
With the required utilities installed, convert the VMware image to RAW format with the control below. Replace VMware_image with the name of your VMware virtual disk file and the RAW_image with what you wish to call the new prototype file.
qemu-img convert -f vmdk -O raw VMware_image.vmdk RAW_image.img
Once the conversion is complete, copy the new RAW image content to the secondary disk. Replace the RAW_image with the converted disk file name merely as above.
dd if=RAW_image.img of=/dev/vdb bs=16M oflag=direct Afterwards, you can close downwardly the server and remove the former primary disk. Go to your UpCloud control panel and the Storage tab at your server settings. Once the server is in the stopped state, click the squirt icon on the primary storage device to remove information technology. The 2nd deejay, where you just transferred the system image, will so exist automatically set as the new master device. In the same menu, yous should as well cull the deejay controller.
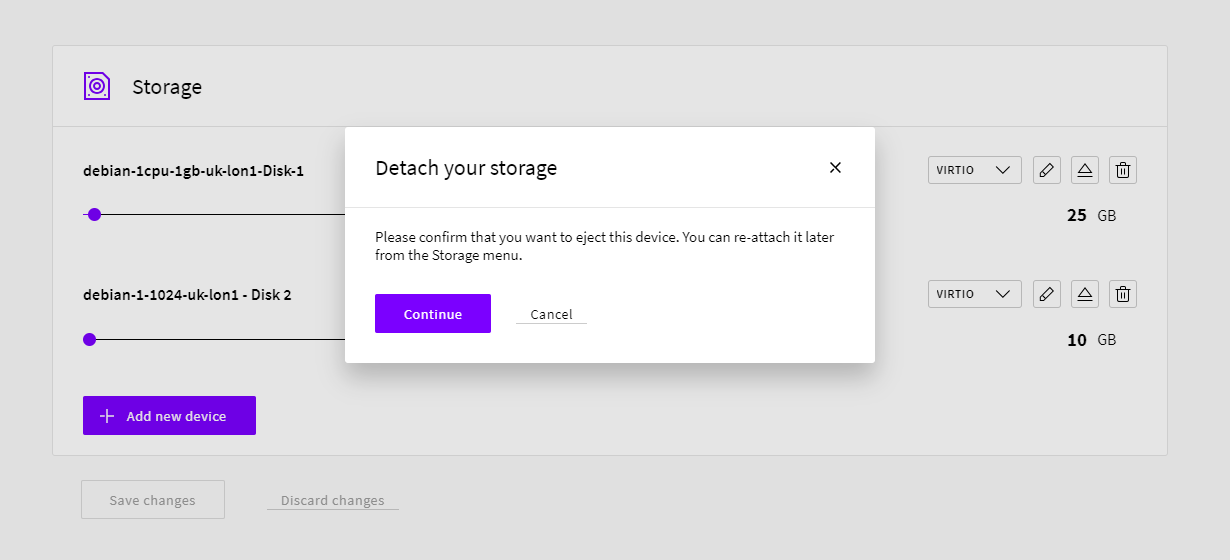
VirtIO controller provides the all-time performance, but if you have problems starting the server, endeavor IDE as information technology has amend compatibility with unlike operating systems.
You tin can then restart the server again to proceed configuring the organization.
Reconfiguring the imported organization
The newly transferred operating system should now work with the cloud server. Yet, depending on your old network setting yous may need to utilise the Spider web Console log into the server and fix any issues before the system will connect normally. Go to your UpCloud control console, open the Panel tab under your server settings, and clickOpen the console connectedness.
At present, log in with the credentials for the imported VMware host as you did before transferring the server to the cloud. Once in, bank check the network settings with the following command.
ip addr
UpCloud hosts take three network interfaces in the default configuration, public IPv4, private IPv4 and public IPv6 addresses, you might run across something similar to the example output below. Here the first interface eth0 is working merely the other devices are not notwithstanding configured.
ane: lo: <LOOPBACK,Upwardly,LOWER_UP> mtu 65536 qdisc noqueue country UNKNOWN group default link/loopback 00:00:00:00:00:00 brd 00:00:00:00:00:00 inet 127.0.0.1/viii scope host lo valid_lft forever preferred_lft forever inet6 ::ane/128 scope host valid_lft forever preferred_lft forever ii: eth0: <Broadcast,MULTICAST,UP,LOWER_UP> mtu 1500 qdisc pfifo_fast state Upward group default qlen 1000 link/ether 6e:d7:1b:bf:18:29 brd ff:ff:ff:ff:ff:ff inet 83.136.248.62/22 brd 83.136.251.255 telescopic global eth0 valid_lft forever preferred_lft forever inet6 fe80::6cd7:1bff:febf:1829/64 scope link valid_lft forever preferred_lft forever three: eth1: <BROADCAST,MULTICAST> mtu 1500 qdisc noop state Downwardly group default qlen 1000 link/ether 6e:d7:1b:bf:e6:f2 brd ff:ff:ff:ff:ff:ff iv: eth2: <Broadcast,MULTICAST> mtu 1500 qdisc noop country Downward group default qlen 1000 link/ether 6e:d7:1b:bf:61:a8 brd ff:ff:ff:ff:ff:ff
Edit your network configuration files to match the network interface names listed in the command output. For example on Ubuntu and other Debian-based systems utilise the command below to open the configuration file.
sudo nano /etc/network/interfaces
Add the post-obit sections to the file. If the network interfaces on your server are named differently, utilise those names instead of eth0, eth1, etc.
car lo iface lo inet loopback machine eth0 iface eth0 inet dhcp car eth1 iface eth1 inet dhcp automobile eth2 iface eth2 inet6 auto
On CentOS and other Cherry-red Lid variants, the network interfaces are configured in individual files. These files are stored in the /etc/sysconfig/network-scripts/ directory, check the file names with the command below.
ls /etc/sysconfig/network-scripts/ | grep ifcfg-
Then open the starting time interface file for edit, for example, ifcfg-eth0.
sudo vi /etc/sysconfig/network-scripts/ifcfg-eth0
The file should read at least the following settings. In example, ONBOOT is set to no, modify information technology to yes and save the file.
DEVICE=eth0 BOOTPROTO=dhcp ONBOOT=yep
You lot may need to exercise the aforementioned operation to other network interfaces, or simply create new configuration files if your old system only had 1 or two interfaces.
Afterwards, reboot the server and effort logging in with SSH. If the network is working you can showtime using the new host equally before with the added benefit of the freely scalable organization resources and faster than SSD storage disks with MaxIOPS engineering science.
Final steps
Congratulations, your imported VMware organization should now exist up and running on a brand new deject host. In case yous have any further problems with the network, you tin find additional help with troubleshooting the connectivity at the guide nigh network bug with Linux host.
As well, if yous run across issues with booting from the migrated system image, you can e'er attach the erstwhile primary deejay again and find the uploaded VMware disk stored safely for some other try without the need to await for the image to upload again. Once you are confident that the imported system is running properly, you lot can go to the Storage menu at your UpCloud control panel and delete the unnecessary storage device.
Source: https://upcloud.com/community/tutorials/import-vmware-images/
Posting Komentar untuk "Upload Image File to Vmware Esxi -iso"